
Preparing to enroll the Mercury controller
2026-03-31Last updated
Before you enroll the Mercury controller on the Synergis™ Cloud Link unit, you must assign a static IP address to the controller.
Before you begin
- Mercury Setup and Configuration Guide
- Instruction manual for connecting to the web portal of your Mercury controller and setting up its IP address (and other configurations).
- Static IP address
- Static IP address assigned to the controller by your IT department.
- Physical addresses
- Each interface panel attached to the same RS-485 port of the same Mercury controller must have a unique physical address (configured on a DIP switch).
Best Practice:
If you have many Mercury controllers to enroll on the same Synergis Cloud Link unit, it is best to enroll them all at the same time. Each
controller you add or remove from the Synergis Cloud Link unit causes the unit
to restart. While the unit restarts, it’s offline for about 30 seconds.
What you should know
Note:
The steps and instructions tagged with Hardening are
optional, but will protect your system against cyberattacks.
Procedure
-
In the Host Communication page, configure the following settings,
and click Accept.
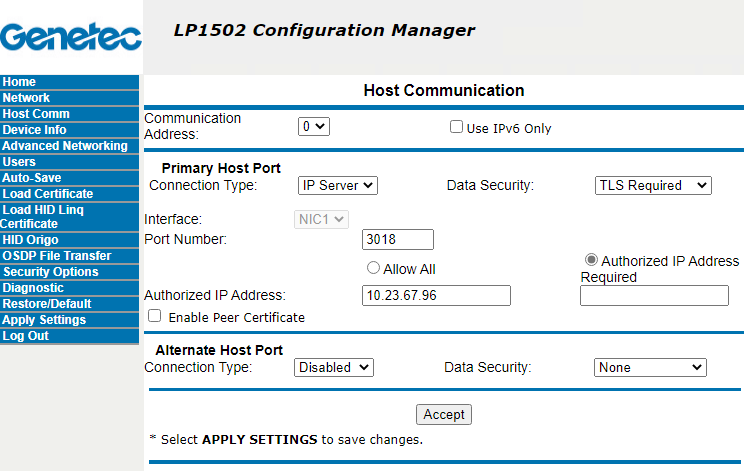
- Communication Address
- Set to 0.Important:Not to be confused with the Channel that must be unique when you enroll the Mercury controller on the Synergis Cloud Link unit.
- Port Number
- The port number used by the Synergis Cloud Link unit to communicate with the Mercury controller (default=3001).
- Authorized IP Address Required
- (Hardening) Select this option, and set Authorized IP address to the IP address of the Synergis Cloud Link unit.
- Data Security
- Set to TLS Required.Important:If TLS is not selected, the Mercury controller stays offline.
-
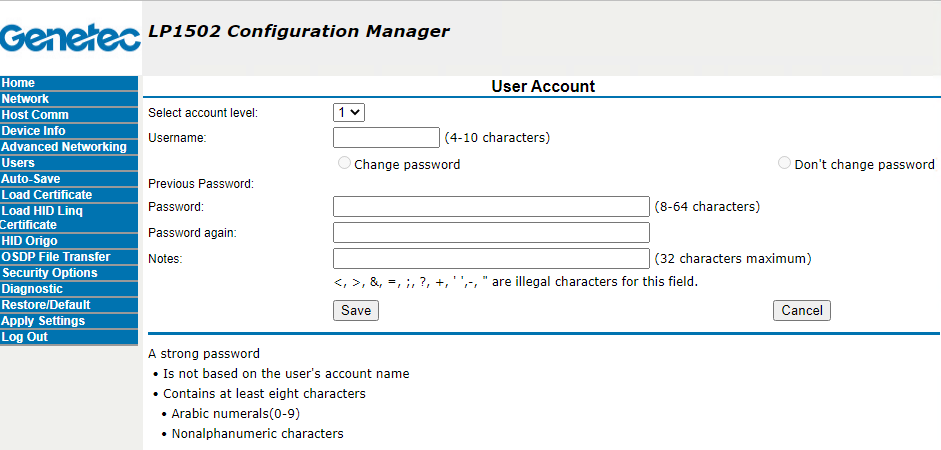
Create a new user on the Mercury controller.
This saves you from having to physically access the unit and set the DIP switch S1-1 to ON every time you modify the controller configuration.
-
Under the users list, click New User.
The User Account page opens.
The Users page opens and the new user is added to the list. -
Under the users list, click New User.
-
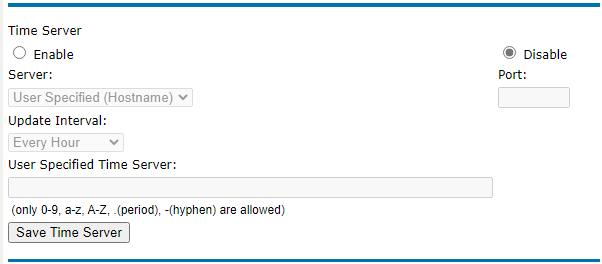
Under Time Server, select Disable.
The Time Server is not required. Synergis™ Softwire monitors and automatically sets the time on the Mercury units.
-
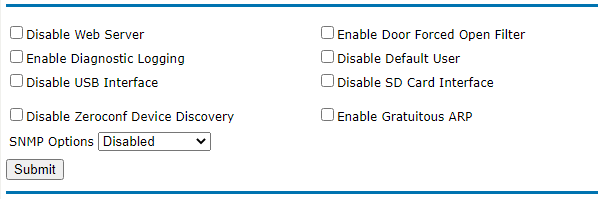
(Hardening) Next to SNMP Options, select
Disabled, and then click Submit.
After you finish
- The next time you need to sign in to the Mercury controller, you can user the new user.
- Enroll the Mercury controller on the Synergis Cloud Link unit.