
Configuring interface modules connected to the Synergis Cloud Link unit
2025-07-29Last updated
To establish communication between the Synergis™ Cloud Link unit and the connected interface modules, you must configure them in the Synergis™ Appliance Portal.
Before you begin
What you should know
Note:
Mercury LP and MP controllers and
Honeywell controllers (PW6K1IC, PRO32IC, PW7K1IC, and PRO42IC) must be enrolled and
configured from Security Center Config Tool on the access control unit's
Peripherals page.
Procedure
-
Click .
The portal shows the hardware tree as three columns. The information displayed in each column varies depending on what you select in the previous column:
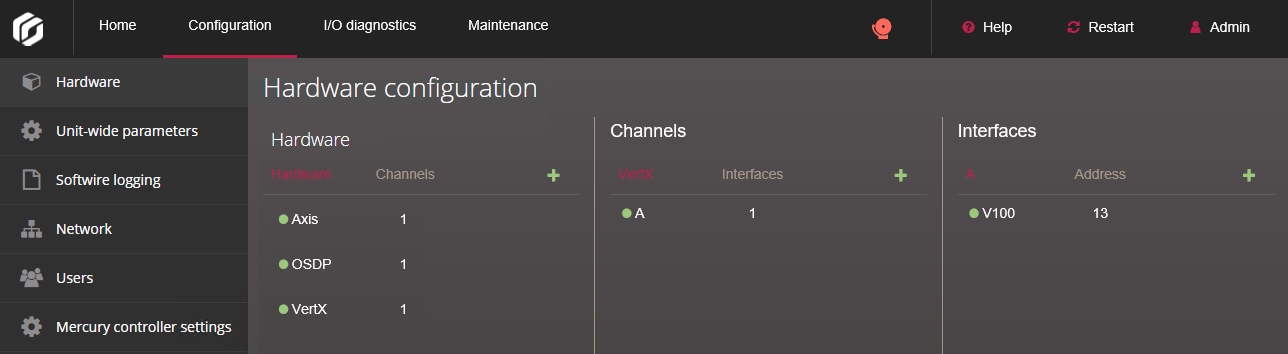
- Hardware
- Your configured hardware manufacturers and the number of channels they use. Clicking a hardware manufacturer displays its channels in the second column.
- Channels
- The channels of the manufacturer selected in the first column. Hovering
over a channel displays the edit (
 ), clone (
 ), and delete (
 ) options.
 - Interfaces
- The interface modules connected to the channel selected in the second column.
-
At the top of the Hardware column, click
Add (
 ).
).
-
For each interface module you added, select it from the hardware tree and click
, then configure its settings in the window that opens.
For the description of these settings, refer to the manufacturer’s documentation.